
Greenhouse vs Hoop House: Extend Growing Season on Your Homestead
In the world of homesteading, maximizing your harvest year-round is a game-changer. Whether you’re battling short summers in cooler climates or unpredictable weather patterns, incorporating a greenhouse or hoop house can transform your gardening efforts. These structures allow you to extend growing season by protecting plants from frost, wind, and pests while creating a controlled microclimate. If you’re considering adding one to your homestead, this guide will walk you through the essentials, from selection to setup and beyond, helping you make informed decisions for bountiful yields.

Disclaimer
This post contains affiliate links. This means we may earn a commission should you chose to sign up for a program or make a purchase using these links. There is no added cost to you but your purchase through these links helps support our content! Not to worry- I truly believe in and/or use everything I promote!
We also utilize advertisements on many of our articles. This is simply a way to help support all the work we do here at Wild N Free Farms, without adding any extra cost to our readers. Check out our disclaimer and disclosure page for more details.
Understanding the Basics: Greenhouses vs. Hoop Houses
Before diving into implementation, it’s crucial to differentiate between greenhouses and hoop houses, as each offers unique advantages for extending your growing season.
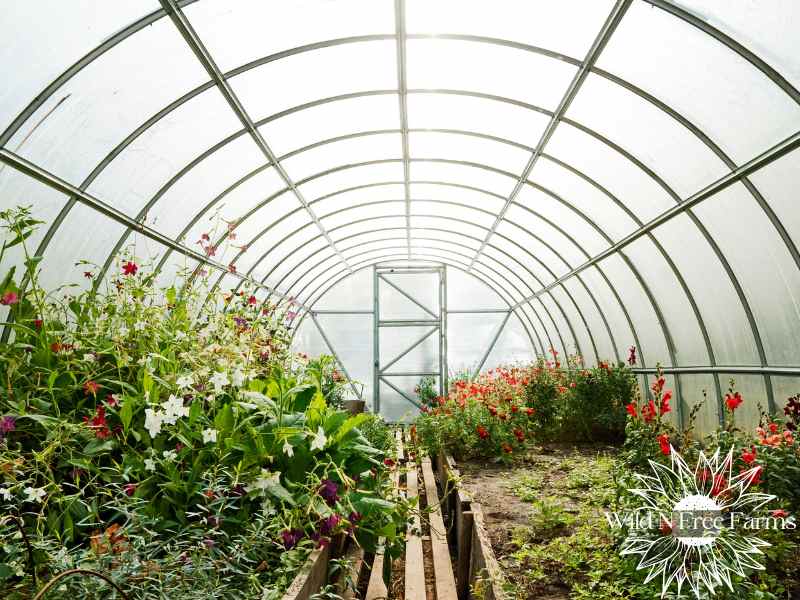
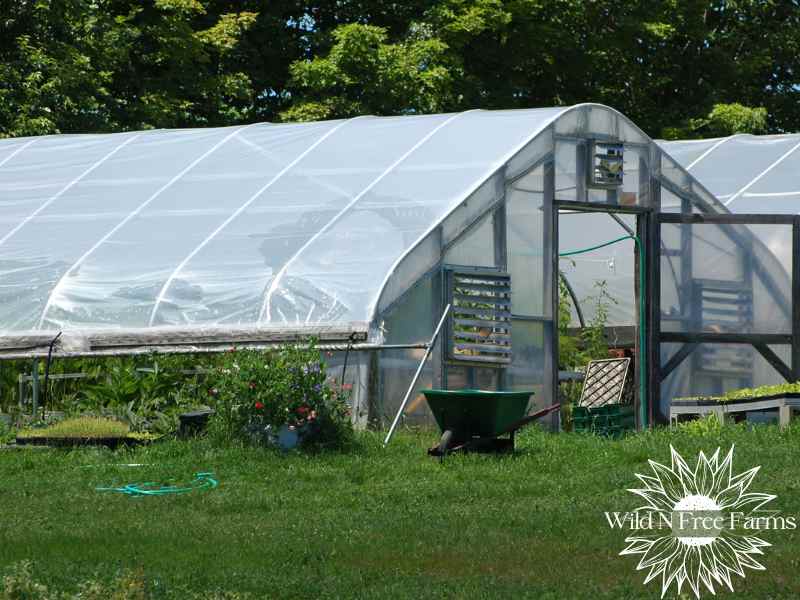
- Greenhouses: These are typically rigid structures made from glass, polycarbonate, or acrylic panels framed with metal or wood. They provide excellent light transmission and insulation, making them ideal for year-round gardening in harsh climates. Greenhouses often include features like ventilation systems, heating options, and shelving for vertical growing.
- Hoop Houses: Also known as high tunnels, these are more affordable and flexible alternatives constructed from PVC or metal hoops covered with polyethylene plastic sheeting. They’re easier to assemble and disassemble, offering good protection against early frosts and extending the season by 4-6 weeks on either end. However, they may require more frequent cover replacements due to UV degradation.
Both options can significantly lengthen your growing period—greenhouses for full winter production and hoop houses for shoulder-season boosts—depending on your budget and needs.
The Benefits of Extending Your Growing Season
Adding a greenhouse or hoop house to your homestead isn’t just about more produce; it’s about sustainability, cost savings, and self-sufficiency. Here’s why they’re worth the investment:
- Frost Protection and Climate Control: These structures shield plants from late spring frosts and early fall chills, potentially adding months to your harvest window. In zones with short seasons (like USDA zones 3-5), this can mean fresh veggies from March through November.
- Pest and Disease Management: Enclosed environments reduce exposure to insects, birds, and larger animals. With proper ventilation, you can also minimize fungal issues like powdery mildew.
- Water Efficiency: Rainwater collection systems integrated into these setups conserve resources, while the controlled space allows for precise irrigation, reducing waste.
- Increased Yields and Variety: Grow heat-loving crops like tomatoes, peppers, and eggplants earlier, or experiment with exotic varieties that wouldn’t thrive outdoors. Overwinter hardy greens such as kale and spinach for continuous supply.
- Economic Perks: Homegrown food cuts grocery bills, and surplus can be sold at farmers’ markets, turning your homestead into a small income source.
Studies from agricultural extensions show that hoop houses can increase production by up to 30% in temperate regions, making them a smart choice for beginners.
Choosing the Right Structure for Your Homestead
Selecting between a greenhouse and a hoop house depends on your location, budget, and goals. Consider these factors:
- Climate and Site Assessment: Evaluate your property’s sunlight exposure (aim for 6-8 hours daily), wind patterns, and soil drainage. In windy areas, opt for sturdy greenhouses; for milder spots, hoop houses suffice.
- Size and Scalability: Start small— a 8×10 foot hoop house for hobbyists or a 20×30 foot greenhouse for serious production. Ensure room for expansion as your skills grow.
- Budget Breakdown: Hoop houses cost $500-$2,000 for DIY kits, while greenhouses range from $1,000-$10,000+ depending on materials. Factor in ongoing expenses like heating (for greenhouses) or plastic replacements (every 3-5 years for hoops).
- Permits and Regulations: Check local zoning laws; some areas require permits for structures over a certain size. In urban homesteads, portable hoop houses offer flexibility without permanent commitments.
- Sustainability Features: Look for eco-friendly options like recycled plastic covers or solar-powered vents to align with homesteading principles.
Pro tip: Visit local nurseries or online forums for user reviews tailored to your region.

Step-by-Step Setup Guide
Installing your chosen structure doesn’t have to be overwhelming. Follow these steps for a smooth process:
- Prepare the Site: Level the ground, remove weeds, and lay a weed barrier. For greenhouses, pour a concrete foundation if needed; hoop houses can sit on ground anchors.
- Assemble the Frame: For hoop houses, bend hoops into arches and secure them every 4-6 feet. Greenhouses involve framing panels—follow manufacturer instructions to avoid gaps.
- Install Covering and Ventilation: Stretch plastic taut over hoops or seal panels in greenhouses. Add roll-up sides or automatic vents to prevent overheating (aim for 70-85°F daytime temps).
- Add Internal Features: Incorporate benches, drip irrigation, and shade cloths. For extended seasons, include propane heaters or thermal mass (like water barrels) to retain heat overnight.
- Test and Plant: Monitor temperatures for a week before planting. Start with cool-season crops to acclimate.
DIY enthusiasts can save 50% by building from scratch using online tutorials, but kits ensure durability.
Best Crops for Extended Growing Seasons
Maximize your structure’s potential by selecting crops that thrive in protected environments:
- Early Starters: Radishes, lettuce, and carrots can be sown 4-6 weeks before the last frost.
- Warm-Season Favorites: Tomatoes, cucumbers, and basil benefit from the heat retention, yielding earlier and longer.
- Overwintering Options: Kale, Swiss chard, and garlic survive mild winters inside, providing fresh greens in off-seasons.
- Exotics and Herbs: Try figs, citrus (in heated greenhouses), or continuous herbs like rosemary for year-round flavor.
- Succession Planting Tips: Rotate crops every 6-8 weeks to maintain soil health and avoid pests. Use companion planting, like marigolds with tomatoes, for natural deterrence.
Experiment with heirloom varieties for better adaptation to your microclimate.
Maintenance and Troubleshooting Tips
To ensure longevity and productivity:
- Regular Inspections: Check for tears in hoop house plastic or cracks in greenhouse panels. Clean surfaces to maximize light.
- Temperature Management: Use thermometers and fans; avoid extremes that stress plants.
- Soil and Fertility: Amend with compost annually; test pH (aim for 6.0-7.0) to prevent nutrient lockout.
- Pest Control: Introduce beneficial insects like ladybugs; use organic sprays for outbreaks.
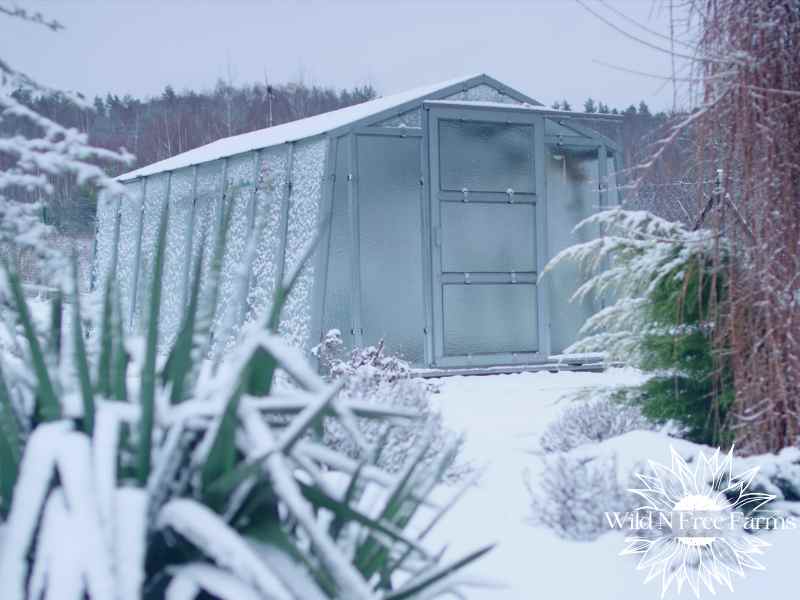
- Winter Prep: Insulate with bubble wrap or row covers; remove snow buildup to prevent collapse.
Common issues like condensation can be mitigated with proper airflow, extending your setup’s life to 10+ years.
Incorporating a greenhouse or hoop house is a rewarding step toward food independence and extended growing seasons. By protecting your plants and optimizing conditions, you’ll enjoy fresher produce, reduced reliance on stores, and the satisfaction of year-round gardening. Start small, learn from each season, and watch your homestead flourish. Ready to get growing? Assess your space today and take the first step toward a more resilient garden.


