DIY Composting For Beginners: Turning Waste into Garden Gold
Imagine transforming your kitchen scraps and yard waste into nutrient-rich soil that supercharges your garden. That’s the magic of DIY composting for beginners! If you’re a beginner looking to reduce waste, save money on fertilizers, and grow healthier plants, you’ve come to the right place. Composting is an eco-friendly process where organic materials break down into a dark, crumbly substance called humus—often dubbed “garden gold” for its soil-enhancing properties. In this guide, we’ll cover everything a newbie needs to know about starting your own compost pile at home, from basics to troubleshooting, all tailored for garden use.

Disclaimer
This post contains affiliate links. This means we may earn a commission should you chose to sign up for a program or make a purchase using these links. There is no added cost to you but your purchase through these links helps support our content! Not to worry- I truly believe in and/or use everything I promote!
We also utilize advertisements on many of our articles. This is simply a way to help support all the work we do here at Wild N Free Farms, without adding any extra cost to our readers. Check out our disclaimer and disclosure page for more details.
Why Start Composting for Your Garden?
Composting isn’t just good for the planet; it’s a game-changer for your backyard. By recycling organic waste, you divert up to 30% of household trash from landfills while creating a free, natural fertilizer. The benefits include:
- Improved Soil Structure: Compost adds organic matter, helping sandy soils retain water and clay soils drain better.
- Nutrient Boost: It’s packed with essential nutrients like nitrogen, phosphorus, and potassium, promoting vigorous plant growth without chemical fertilizers.
- Pest and Disease Resistance: Healthy, compost-amended soil fosters beneficial microbes that suppress plant diseases.
- Cost Savings: Say goodbye to buying potting mix or mulch—your compost does it all.
- Environmental Impact: Reduces methane emissions from landfills and lowers your carbon footprint.
For gardeners, composting closes the loop: waste from your plants returns as nourishment, creating a sustainable cycle.

Getting Started: Materials and Setup for Beginners
You don’t need fancy equipment to begin composting. Most setups cost under $50, and you can even use free materials. Here’s what you’ll need:
Essential Tools and Supplies
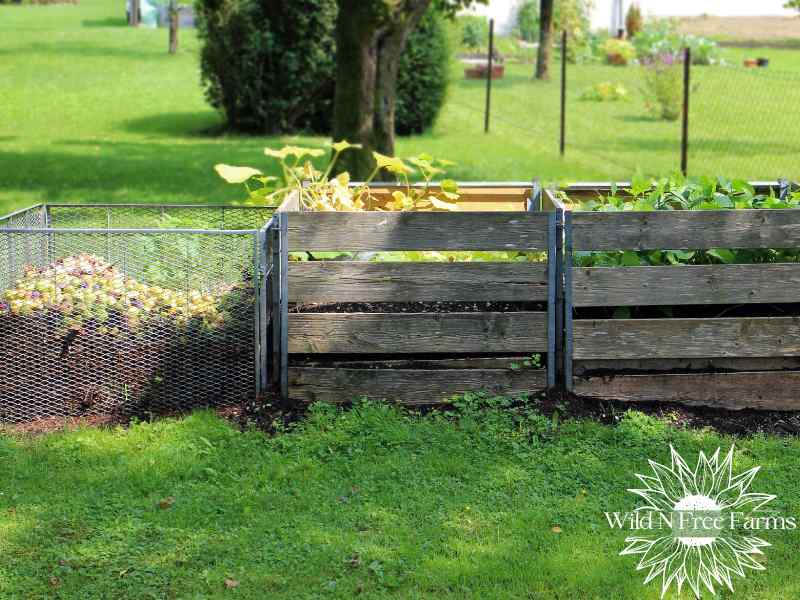
- Compost Bin or Pile: A enclosed bin keeps things tidy and deters pests. Options include store-bought tumblers, wire mesh enclosures, or a simple DIY bin from pallets or plastic totes.
- Kitchen Scrap Collector: A small countertop bin with a lid to store daily scraps.
- Pitchfork or Aerator Tool: For turning the pile to add oxygen.
- Water Source: A hose or watering can to maintain moisture.
- Optional Add-ons: Gloves, a thermometer (to monitor heat), and a sifter for harvesting finished compost.
Choose a spot in your yard that’s convenient, partially shaded, and well-drained—away from direct sun to prevent drying out, but not too shady to slow decomposition.
Choosing the Right Composting Method
As a newbie, start simple:
- Open Pile: Ideal for large yards; just heap materials on the ground.
- Bin System: Use one or multiple bins for rotation (e.g., three-bin setup for different stages).
- Tumbler: Great for small spaces; easy to turn but pricier.
- Vermicomposting: Use worms in a bin for indoor or fast composting, perfect if you’re short on outdoor space.
Aim for a pile at least 3x3x3 feet for efficient heating and breakdown.

What to Compost: Balancing Greens and Browns
The key to successful composting is balance. Materials are categorized as “greens” (nitrogen-rich, moist) and “browns” (carbon-rich, dry). Aim for a 2:1 ratio of browns to greens by volume for optimal decomposition.
Green Materials (Nitrogen Sources)
These provide moisture and speed up breakdown:
- Fruit and vegetable scraps (e.g., banana peels, carrot tops)
- Coffee grounds and tea bags
- Fresh grass clippings
- Plant trimmings and weeds (without seeds)
- Manure from herbivores (e.g., cow, horse—but avoid pet waste)
Brown Materials (Carbon Sources)
These add structure and prevent odors:
- Dry leaves and straw
- Cardboard and newspaper (shredded, non-glossy)
- Wood chips or sawdust (untreated)
- Eggshells (crushed for faster breakdown)
- Pine needles (in moderation, as they’re acidic)
Layer them alternately: Start with browns at the bottom for drainage, then add greens, and top with browns to control smells.

What Not to Compost: Avoiding Common Mistakes
To prevent pests, odors, and contamination, skip these:
- Meat, dairy, and bones (attract animals and cause smells)
- Oily foods or cooked items (slow decomposition)
- Diseased plants or weeds with seeds (spread issues to your garden)
- Pet waste (risk of pathogens)
- Treated wood or glossy paper (chemicals)
- Citrus peels in excess (too acidic for worms if vermicomposting)
If in doubt, remember: If it grew from the ground, it’s probably compostable—except for the exceptions above.

Step-by-Step Guide to Building Your Compost Pile
- Prepare the Base: Lay down a layer of coarse browns like twigs for aeration.
- Add Layers: Alternate greens and browns, chopping large items for faster breakdown.
- Moisten: Water each layer lightly—aim for the consistency of a wrung-out sponge.
- Activate: Add a handful of garden soil or finished compost to introduce microbes.
- Cover: Top with browns and a lid or tarp to retain heat and moisture.
- Turn Regularly: Every 1-2 weeks, mix the pile to aerate and distribute heat.
In warm weather, your compost could be ready in 2-3 months; in cooler climates, expect 6-12 months.

Maintaining Your Compost: Tips for Success
Composting is low-maintenance, but monitoring helps:
- Moisture Level: Too dry? Add water or greens. Too wet? Add browns and turn.
- Temperature: A healthy pile heats to 130-160°F, killing weeds and pathogens. Use a thermometer if possible.
- Aeration: Turning introduces oxygen, preventing anaerobic smells.
- Odor Control: Bad smells mean too much moisture or greens—balance with browns.
- Pest Prevention: Bury food scraps deep and use a secure bin.
Check weekly and adjust as needed. Patience is key; nature does most of the work!
Troubleshooting Common Composting Problems
Newbies often encounter issues—here’s how to fix them:
- Slow Decomposition: Add more greens or turn more frequently.
- Bad Odors: Overly wet or imbalanced—add browns and aerate.
- Pests (e.g., flies, rodents): Cover scraps, avoid prohibited items, or use a tumbler.
- Too Wet/Soggy: Mix in dry browns like leaves or cardboard.
- Too Dry: Water and add greens.
- Weeds Growing: Heat isn’t high enough—turn and add nitrogen.
If problems persist, start a new pile and learn from the old one.

Harvesting and Using Your Compost in the Garden
When your compost is dark, earthy-smelling, and crumbly (no recognizable scraps), it’s ready—usually after 3-6 months.
How to Harvest
- Stop adding materials 1-2 months before harvesting.
- Sift through a screen to remove large chunks (return them to the pile).
- Store finished compost in a covered bin until use.
Garden Applications
- Soil Amendment: Mix 2-3 inches into garden beds before planting to enrich soil.
- Mulch: Spread around plants to retain moisture and suppress weeds.
- Potting Mix: Blend 1/3 compost with soil and perlite for containers.
- Compost Tea: Steep in water for a liquid fertilizer to foliar feed plants.
- Lawn Top-Dressing: Apply thinly to improve grass health.
Start small: Test on a few plants to see the difference in growth and yield.

DIY composting is an accessible, rewarding way to turn everyday waste into garden gold. As a beginner, remember the basics—balance, moisture, aeration—and you’ll be producing rich compost in no time. Not only will your garden thrive, but you’ll contribute to a greener planet. Ready to get started? Grab those scraps and build your pile! For more gardening tips, check out our other posts on sustainable practices.
What are you waiting for? Share your composting experiences in the comments below!


