How to Braid Softneck Garlic for Long-Term Storage
Garlic lovers, rejoice! Imagine having an endless supply of fresh, flavorful garlic at your fingertips, even months after harvest. Sound too good to be true? Well, think again. In this article, we will unveil the secrets of how to braid softneck garlic for long-term storage. Not only will you save precious space in your kitchen, but you’ll also prolong the shelf life of this culinary gem. Get ready to embark on a journey that will transform your garlic game forever.

Disclaimer
This post contains affiliate links. This means we may earn a commission should you chose to sign up for a program or make a purchase using these links. There is no added cost to you but your purchase through these links helps support our content! Not to worry- I truly believe in and/or use everything I promote!
We also utilize advertisements on many of our articles. This is simply a way to help support all the work we do here at Wild N Free Farms, without adding any extra cost to our readers. Check out our disclaimer and disclosure page for more details.
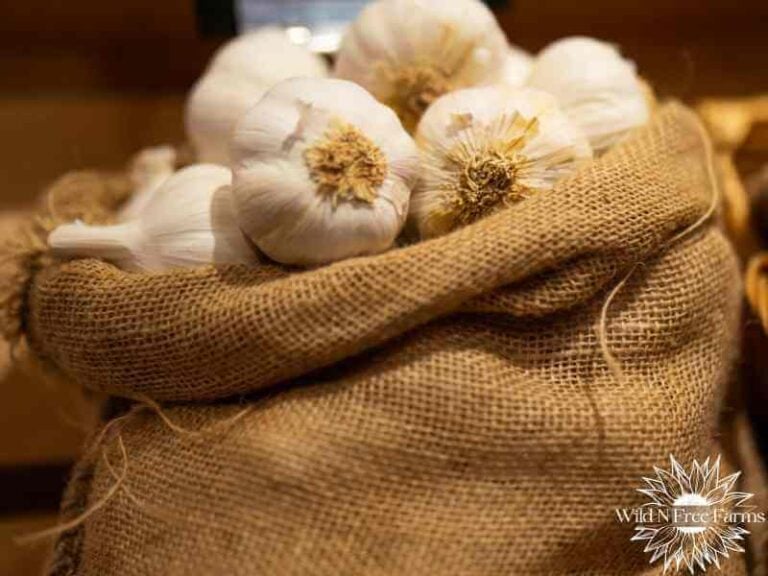
Choosing the Right Garlic Bulbs
To ensure a successful garlic braid for long-term storage, it all starts with choosing the right garlic bulbs. As with any garden produce, the quality of the bulbs you select will directly impact the longevity and flavor of your braided garlic. So, let’s take a closer look at what to consider when choosing the perfect bulbs for your garlic braids.
Blemish Free
First, it’s crucial to choose bulbs that are free from any signs of disease or damage. Inspect the cloves to ensure they are firm and plump, without any soft spots or blemishes. A healthy bulb will have papery outer layers that are intact and tightly wrapped around the individual cloves.
Size Matters
Another factor to consider is the size of the garlic bulbs. While smaller bulbs may be tempting due to their quicker maturation and easier braiding, larger bulbs are generally preferred for long-term storage. Their larger cloves have more protective layers, providing better insulation against moisture and other elements that can lead to spoilage.
Right Varieties
When selecting garlic bulbs for braiding, it’s also essential to choose the right variety. Softneck garlic is the preferred choice for braiding due to its flexibility and longer shelf life compared to hardneck varieties. Common softneck garlic varieties include Silverskin and Artichoke, both of which are well-suited for braiding and storing.

Preparing the Garlic Bulbs for Braiding
Now that we’ve covered the essentials of choosing the right garlic bulbs, let’s move on to the next step: preparing the garlic bulbs for braiding. Before you can start the braiding process, it’s important to properly prepare your garlic bulbs.
Cure The Bulbs
It’s important to cure the bulbs before attempting to braid. Curing allows the garlic to fully dry, which not only enhances its flavor but also improves its storage potential. To cure your garlic bulbs, lay or hang them in a cool, well ventilated area. Be sure to keep the bulbs out of direct sunlight to prevent them from overheating or becoming sunburned.
Brush Off Dirt
After the bulbs are completely cured, carefully brush off any loose dirt or debris from the outer layers of the bulbs. This will help ensure that your braided garlic not only looks visually appealing but also remains clean and free from any potential contaminants.
Trim The Roots
After cleaning the bulbs, you’ll want to trim the roots. Start by using a sharp pair of gardening shears to cut off the roots close to the base of the bulb. Be careful not to remove too much of the root, as it helps anchor the bulb during storage.
Braiding Softneck Garlic Step-by-Step
Once the garlic bulbs have been cured and prepped, they are ready to be braided. This next section will guide you through a step-by-step process on how to braid your softneck garlic, ensuring a beautiful and functional storage display.
Step 1: Begin With the Best
To begin, gather a bunch of cured garlic bulbs, preferably with long stems still attached. Start by selecting three bulbs of similar size and shape. If preferred, you may trim the stalks to about 6 inches in length to make the process a bit easier.
Step 2: Line Up the Bulbs

Arrange the three bulbs side by side, positioning them so that the stems are parallel and the heads of the garlic are facing downward. Take one of the side stalks and wrap it completely around the other two in order to secure the braid. This may also be done with a piece of twine.
Step 3: Begin the Braid

Take stalk #1, which should be in the very back, and cross its stem over the stem of the bulb in the middle, #2. Then, cross the stem of #3, which would now be the one at the very back, over the stem of the bulb in the middle, #1.
Step 4: Add More Bulbs

As you continue braiding, gradually add more cured garlic bulbs to the braid by positioning them on top, aligning the new stalk with the current middle stalk. Make sure to maintain the same crisscross pattern as you go.
Step 5: Secure the Braid
Once you have braided your desired length of garlic bulbs, continue braiding the remaining stalks. Loop the stalk braid and secure it by tying a piece of twine or a rubber band around the end of the stems. This will keep the braid intact and give you a nice hook to hang the garlic bundle.
Step 6: Hang and Store
Find a cool, well-ventilated area to hang your garlic braid. Ideally, it should be a spot that is protected from direct sunlight and has proper airflow.
Optimal Storage Conditions for Garlic Braids
Storing your garlic braids in the optimal conditions will help prolong their shelf-life. It’s best to only braid enough garlic in each braid for what you will use in a few weeks, keeping the other garlic out of the hot kitchen.
Temperature

By choosing a cool location, you create an environment that mimics the conditions garlic naturally prefers. The ideal temperature range for garlic storage is between 40 and 50 degrees Fahrenheit (4 to 10 degrees Celsius). This cool temperature helps to slow down sprouting and maintain the garlic’s freshness for an extended period.
Protect From Sunlight
Furthermore, it’s crucial to protect your garlic from direct sunlight. Exposure to sunlight can lead to the garlic bulbs drying out too quickly, compromising their taste and texture. To prevent this, choose a storage spot where the garlic braid won’t be exposed to any direct rays.
Proper Airflow
Proper airflow is another essential aspect of garlic storage. Hanging the braid allows air to circulate around the bulbs, keeping them dry and reducing the risk of rot or mold. Adequate airflow helps maintain the garlic’s flavor and prevents any unpleasant odors from developing.
In conclusion, mastering the art of braiding softneck garlic opens up a world of possibilities for long-term storage and convenience. By carefully selecting the right garlic bulbs, preparing them properly, and following the step-by-step instructions for braiding, you can successfully preserve your garlic and extend its shelf life. Remember to store your garlic braids in optimal conditions to ensure their freshness. Now, with this newfound knowledge, you can confidently harvest, braid, and enjoy the benefits of having fresh garlic at your fingertips whenever you need it. Embrace the space-saving solution and savor the flavor of your home-braided garlic!