Vermicomposting: Turning Organic Waste into Garden Gold
Are you looking for a way to reduce your carbon footprint, improve your garden’s soil health, and reduce your waste output? Look no further than vermicomposting! This ancient practice of using worms to break down organic matter has been gaining popularity in recent years as more people realize the benefits of this natural process. Below, we’ll cover everything you need to know about vermicomposting, from its history to the benefits of worm castings, and a comprehensive guide on how to get started.

Disclaimer
This post contains affiliate links. This means we may earn a commission should you chose to sign up for a program or make a purchase using these links. There is no added cost to you but your purchase through these links helps support our content! Not to worry- I truly believe in and/or use everything I promote!
We also utilize advertisements on many of our articles. This is simply a way to help support all the work we do here at Wild N Free Farms, without adding any extra cost to our readers. Check out our disclaimer and disclosure page for more details.
What is Vermicomposting?
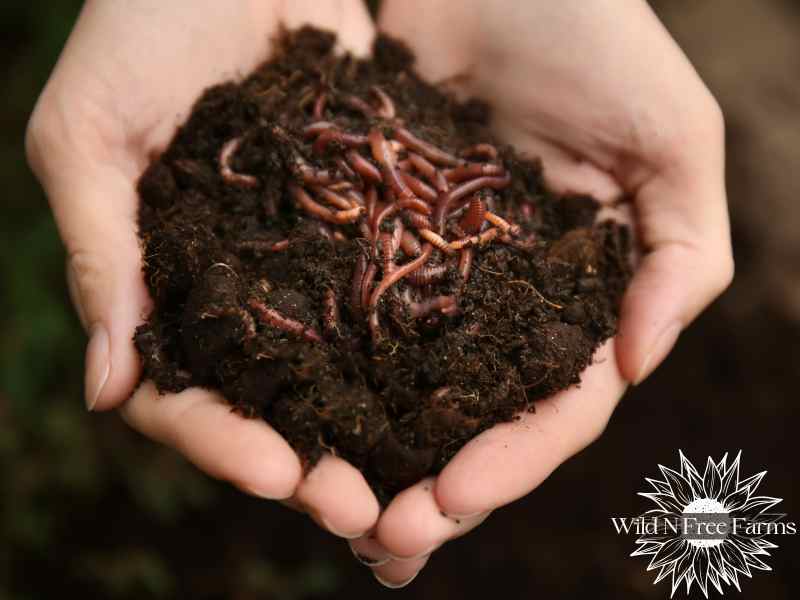
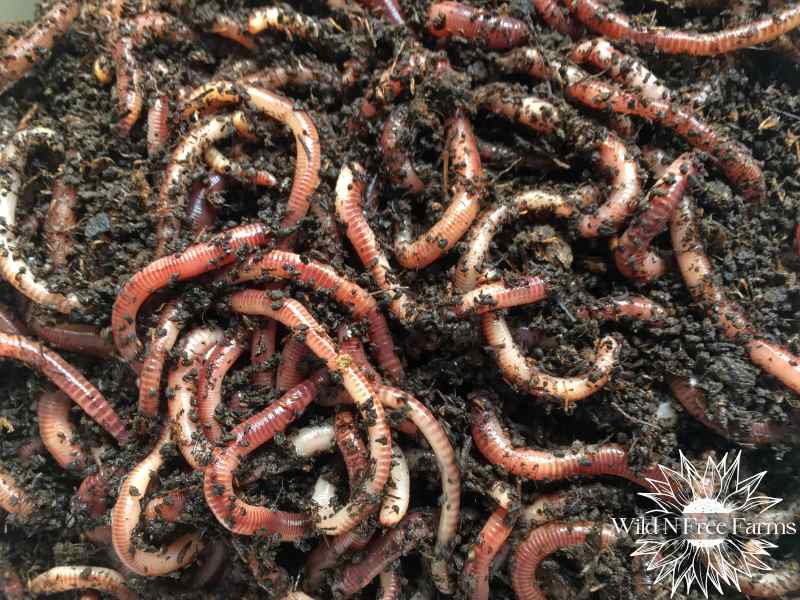
Vermicomposting is the process of using earthworms to break down organic waste materials, such as food scraps, leaves, and grass clippings, into nutrient-rich compost that can be used to improve soil health and plant growth. The process relies on red worms (Eisenia fetida), also known as red wigglers, which are commonly found in many parts of the world.
History of Vermicomposting
Vermicomposting has been practiced for thousands of years, with evidence of worm farming dating back to ancient Egypt, Greece, and Rome. In the 19th century, Charles Darwin conducted experiments on earthworms, which led him to publish a book on the topic, “The Formation of Vegetable Mould Through the Action of Worms.” The book popularized the idea of using worms for soil improvement and inspired many farmers and gardeners to start their own vermicomposting systems.

Benefits of Worm Castings
Worm castings, also known as vermicompost, are rich in nutrients, beneficial microorganisms, and humus, which is essential for healthy plant growth. When added to soil, worm castings improve soil structure, increase water-holding capacity, and stimulate plant growth. They also suppress plant diseases, repel pests, and reduce the need for synthetic fertilizers and pesticides.
How to Get Started with Vermicomposting
Choose a Worm Bin
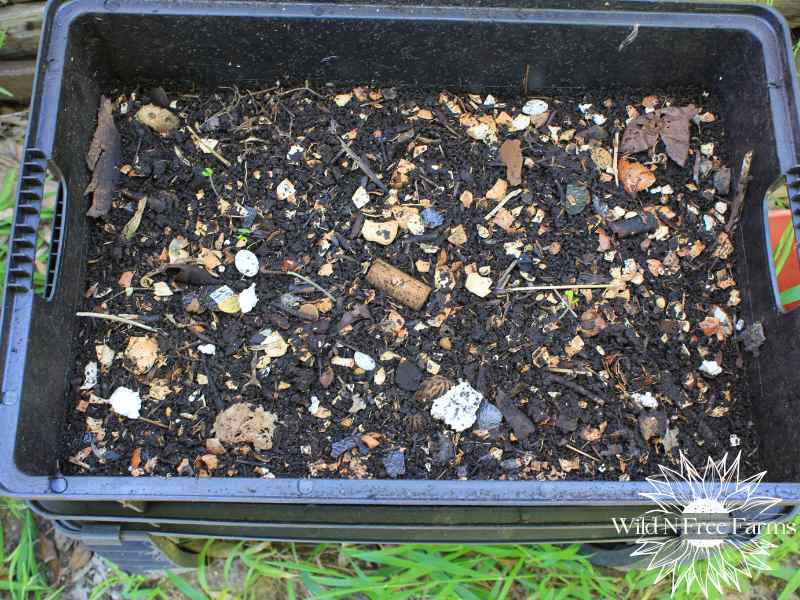
The first step in starting a vermicomposting system is to choose a worm bin. You can purchase a ready-made bin or make your own using a plastic or wooden container. The bin should have a lid to keep pests out, and small holes for aeration.
Add Bedding Material
The next step is to add bedding material to the bin. Bedding material should be moist, but not too wet, and should include materials such as shredded newspaper, cardboard, or leaves. The bedding material provides a habitat for the worms and helps to regulate moisture levels.
Add Worms and Food Scraps
Once the bin is set up, it’s time to add worms and food scraps. Red wigglers from Uncle Jim’s Worm Farm are the best type of worm for vermicomposting, as they are efficient at breaking down organic matter. Start with a small amount of food scraps, such as vegetable and fruit scraps, coffee grounds, and eggshells. Be sure not to overfeed the worms, as this can lead to unpleasant odors and a buildup of excess moisture. Additionally, do not allow the bin to become too acidic by feeding too much acidic or high sugar foods.
Maintain the Worm Bin
Maintaining the worm bin involves keeping the bedding material moist, feeding the worms regularly, and harvesting the vermicompost. It’s important to avoid adding materials that are too acidic or oily, as these can harm the worms. Regularly check the moisture levels, and add water or bedding material as needed.
Vermicomposting is an easy and sustainable way to turn your organic waste into garden gold. By following these simple steps, you can create your own vermicomposting system and reap the benefits of nutrient-rich worm castings in your garden. Happy composting!


