Worm Farming Made Easy: Vermiculture For Beginners
Have you ever wondered how you can turn your kitchen scraps into nutrient-rich compost for your garden? Look no further than vermicomposting, the beginner-friendly secret to sustainable gardening. In this article, we will guide you through the fascinating world of worm farming, unveiling the easy steps to harnessing the power of these humble creatures. From essential supplies to maintaining an efficient worm farm, we’ll explore everything vermiculture for beginners! Get ready to optimize your vermicomposting bin and have all your questions answered. By the end, you’ll be equipped to incorporate this eco-friendly practice into your gardening routine and reap the numerous benefits. So, let’s dig in and unlock the secrets of vermicomposting for beginners!

Disclaimer
This post contains affiliate links. This means we may earn a commission should you chose to sign up for a program or make a purchase using these links. There is no added cost to you but your purchase through these links helps support our content! Not to worry- I truly believe in and/or use everything I promote!
We also utilize advertisements on many of our articles. This is simply a way to help support all the work we do here at Wild N Free Farms, without adding any extra cost to our readers. Check out our disclaimer and disclosure page for more details.
Essential Supplies for Vermiculture
In order to successfully start your vermicomposting journey, it’s important to gather all the essential supplies beforehand. By having the right tools and materials in place, you’ll be well-prepared to create a thriving environment for your worms to work their magic. Let’s take a closer look at the key supplies you’ll need to get started.
Bin
First and foremost, you’ll need a suitable worm bin. This can be as simple as a plastic container with a lid, or you can opt for a more specialized vermicomposting bin available in the market. Look for a bin that is dark in color, as worms prefer darkness and will be more active in these conditions. Additionally, make sure the bin is spacious enough to accommodate your kitchen scraps and provide enough room for the worms to move around comfortably.
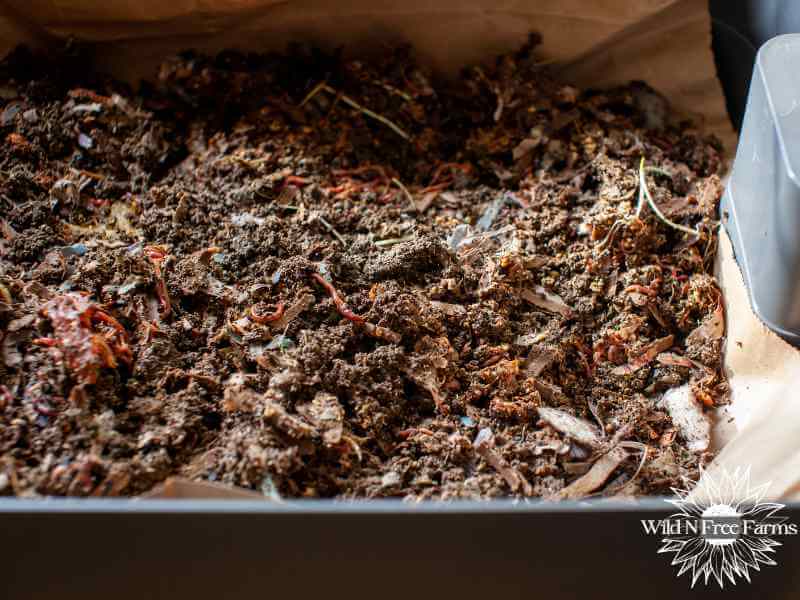
Bedding
Next, you’ll need bedding material to create a cozy home for your worms. Shredded newspaper, cardboard, or coconut coir are popular choices for bedding. Avoid glossy or colored paper, as these can contain harmful chemicals that may harm your worms. Provide a generous amount of bedding material in your bin, ensuring that it is moist but not soaking wet. This will provide your worms with a comfortable environment and help maintain the right moisture levels.

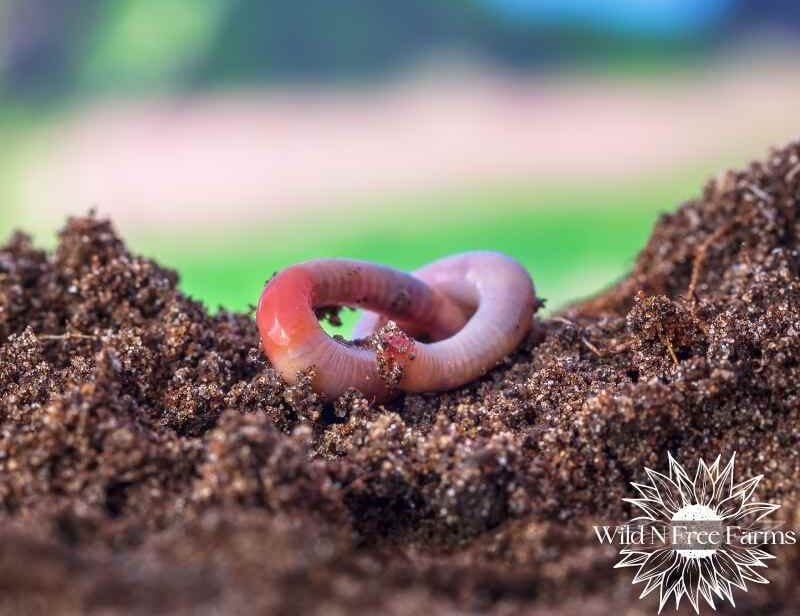
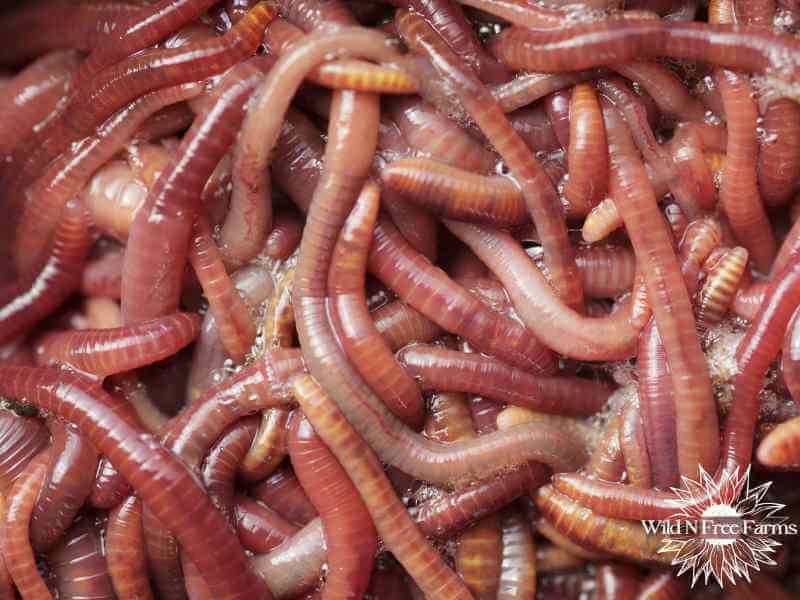
Worms
Now that you have your bin and bedding ready, it’s time to introduce the real stars of the show – the worms! The most commonly used worms for vermicomposting are Red Wigglers (Eisenia fetida) or Red Earthworms (Lumbricus rubellus). These worms are voracious eaters and excellent composters. You can purchase them from local bait shops, gardening centers, or even online worm suppliers. Start with a pound or two of worms, and over time, their population will grow to meet the needs of your vermicomposting system.
Food
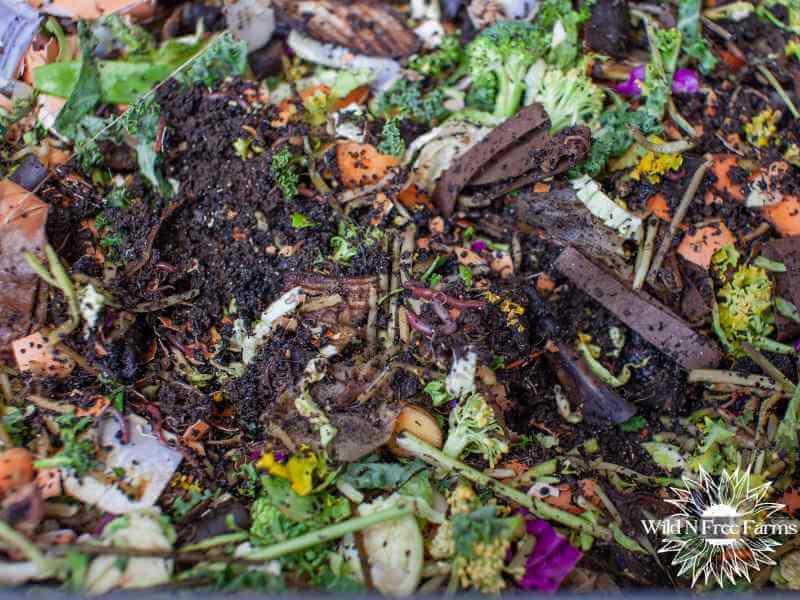
To maintain a healthy and balanced environment for your worms, it’s important to feed them the right kind of organic waste. Kitchen scraps such as fruit and vegetable peels, coffee grounds, tea bags, and crushed eggshells are all excellent food sources for your worms. Avoid feeding them meat, dairy, oily foods, or any processed items as these can attract pests and cause unpleasant odors.
Try to aim for a 2:1 ratio of food to worms. For example, if you have a worm bin with 2 pounds of worms, you’ll want to feed them about 4.5 to 5 pounds of food each week.
Dry Materials
Lastly, to keep your worm bin odor-free and well-aerated, you’ll need to have a supply of dry materials on hand. This can include dry leaves, shredded paper, or straw. Adding a layer of dry materials on top of the kitchen scraps will help absorb excess moisture and prevent any foul smells from developing. It’s important to strike the right balance between wet and dry materials in your bin, ensuring that it remains moist but not waterlogged.
By gathering these essential supplies – a suitable bin, bedding material, worms, organic waste, and dry materials – you’ll be well on your way to setting up a successful vermicomposting system. With these in place, you’ll create an ideal environment for your worms to thrive, helping you transform kitchen scraps into nutrient-rich compost for your garden. So, let’s move on and explore various bin ideas to suit your vermicomposting needs.,
Exploring Various Bin Ideas
The right bin is crucial for creating an ideal environment for your worms to thrive and ensuring a successful vermicomposting system. Here are a few bin ideas to consider that will suit your vermicomposting needs.
Plastic Storage Bin
One of the most popular and easily accessible options is a plastic storage bin. Choose a bin that is at least 12 inches deep and has a lid to help regulate moisture and airflow. Drill small holes in the lid and along the sides of the bin for ventilation.
Wooden Box
If you prefer a more rustic or aesthetically pleasing option, a wooden box can be a great choice. You can easily build one yourself with untreated wood or repurpose an old wooden crate. Just make sure to create ventilation by drilling holes along the sides and bottom of the box.
Worm Tower
A worm tower is a vertical system that allows the worms to move freely between levels. You can use stacked plastic bins or even repurpose PVC pipes. This option is especially useful if you have limited space or want to avoid lifting heavy bins.

Commercial Worm Bin
If you prefer a ready-made option, there are many commercial worm bins available on the market. These bins often come with built-in features like drainage systems, stacking trays, and ventilation mechanisms, making them convenient for beginners.
DIY Innovations
The beauty of vermicomposting is that you can get creative with your bin design. From repurposing old dresser drawers to using metal buckets, there are plenty of innovative ideas out there. Just remember to ensure proper ventilation and drainage in any DIY bin you create.
By exploring these various bin ideas, you can find the perfect match for your vermicomposting needs. Once you have your chosen bin, it’s time to move on to the next section and learn all about the right diets for your hardworking worms.

Insights on Worm Diets
Now that you have your vermicomposting system set up, it’s important to understand the diets that will keep your hardworking worms healthy and thriving. Just like us, worms have specific dietary needs, and providing them with the right types of food will ensure optimal decomposition and nutrient-rich vermicompost. So, let’s explore some insights on worm diets and how to keep your worms content.
Fruits & Veggies
Firstly, it’s important to note that worms are not gourmet eaters. They prefer simple, organic materials that are easy to break down. One of the staple foods for worms is fruit and vegetable scraps. These can include things like banana peels, apple cores, carrot tops, and lettuce leaves. Avoid citrus fruits, onions, garlic, and spicy foods, as these can harm your worms or deter them from their composting duties.
Coffee & Tea
In addition to fruit and vegetable scraps, worms also enjoy coffee grounds and tea bags. These organic materials provide a good source of nitrogen and do wonders for improving the texture and moisture levels in your vermicompost. Just be sure to remove any staples or tags from the tea bags before adding them to the bin.
Proper Bedding
Another important aspect of worm diets is the bedding material. This acts as both a source of carbon and a cozy home for your worms.
Good bedding options include shredded newspaper, cardboard, and dry leaves. Avoid using glossy or colored paper, as the ink may contain toxic chemicals that could harm your worms. Keep the bedding moist to provide a comfortable environment for your worms to live and work.
Feeding Frequency
Remember, moderation is key when it comes to feeding your worms. Overfeeding can lead to an imbalance in the bin and cause odor and pest issues. A general rule of thumb is to add small amounts of food regularly and observe how quickly the worms consume it. If there are leftovers after a few days, reduce the amount of food you’re adding to prevent overfeeding.
By understanding the dietary preferences of your worms and providing them with the right types of food in moderation, you’ll be well on your way to maintaining an efficient worm farm. But before we delve into valuable tips for maintaining your worm farm, let’s ensure you have a good grasp on the feeding requirements and routines for these remarkable creatures.,
Valuable Tips for Maintaining an Efficient Worm Farm
Now that you have a solid understanding of how to feed your worms, let’s move on to some valuable tips for maintaining an efficient worm farm. These tips will not only help you keep your worms happy and healthy but also optimize the vermicomposting process.
Moisture Level
First and foremost, it’s crucial to maintain the right moisture level in your worm bin. Worms need a moist environment to thrive, but excessive moisture can lead to anaerobic conditions and the growth of harmful bacteria. It’s important to strike a balance by regularly checking the moisture content and adjusting it as needed. If the bin feels too dry, you can mist it with water. On the other hand, if it feels too wet, consider adding some dry bedding materials like shredded newspaper or cardboard to absorb the excess moisture.
Fluffy Bedding
Another tip for maintaining an efficient worm farm is to regularly turn and fluff the bedding. This helps aerate the bin and prevent compaction, allowing the worms to move around and break down the organic matter more efficiently. Use a garden fork or a trowel to gently mix the bedding every few weeks, being careful not to disturb the worms too much.
Temperature
Monitoring the temperature of your worm farm is also crucial. Worms thrive in temperatures between 55°F and 77°F (13°C to 25°C). Extreme heat or cold can be detrimental to their well-being. If your worm farm is located outdoors, consider insulating the bin during colder months or moving it to a more temperature-controlled area. Additionally, avoid placing the bin in direct sunlight, as excessive heat can cause the bedding to dry out.
Signs Of Issues
Lastly, keep an eye out for any signs of issues in your worm farm. If you notice foul odors or an increase in pest activity, it’s a sign that something might be off. Adjust your feeding habits, moisture levels, or bedding materials accordingly to address the problem. Regularly inspecting your worm farm and addressing any issues promptly will help ensure its efficiency and longevity.
By implementing these valuable tips for maintaining an efficient worm farm, you’ll be able to optimize the vermicomposting process and enjoy the benefits of nutrient-rich worm castings for your plants. Now that you understand how to maintain your worm farm, let’s move on to the next section on optimizing your vermicomposting bin.
Addressing Common Questions
Now that you understand how to maintain your worm farm, let’s move on to answering some common questions about vermicomposting. As a beginner, you may have a few concerns or uncertainties about this process. In this section, we will answer these questions and provide you with the information you need to confidently continue your vermicomposting journey.
“What can I feed my worms?”
While worms are quite versatile when it comes to their diet, it’s important to remember that they thrive on organic matter. Some typical food options for your worm farm include fruit and vegetable scraps, coffee grounds, tea bags, and shredded paper. Avoid feeding them meat, dairy products, citrus fruits, and oily foods, as these can attract pests or create unpleasant odors.
“How often should I feed my worms?”
The feeding frequency depends on the size of your worm population and the amount of organic waste produced daily. Initially, start with small quantities of food and gradually increase the amount as your worm colony grows. As a general rule, it’s better to slightly underfeed your worms than overfeed them, as excess food can lead to anaerobic conditions and unpleasant smells. Monitoring your worms’ consumption and adjusting accordingly will help strike the right balance.
“Do worm farms attract pests?”
While it’s true that fruit flies or other insects may appear in your worm farm, it’s usually a sign of overfeeding or improper bin maintenance. To prevent these unwanted visitors, bury your food scraps beneath the bedding material and ensure the bin is properly covered. Maintaining a good balance of moisture and regularly turning the compost will also discourage pests from taking up residence in your worm farm.
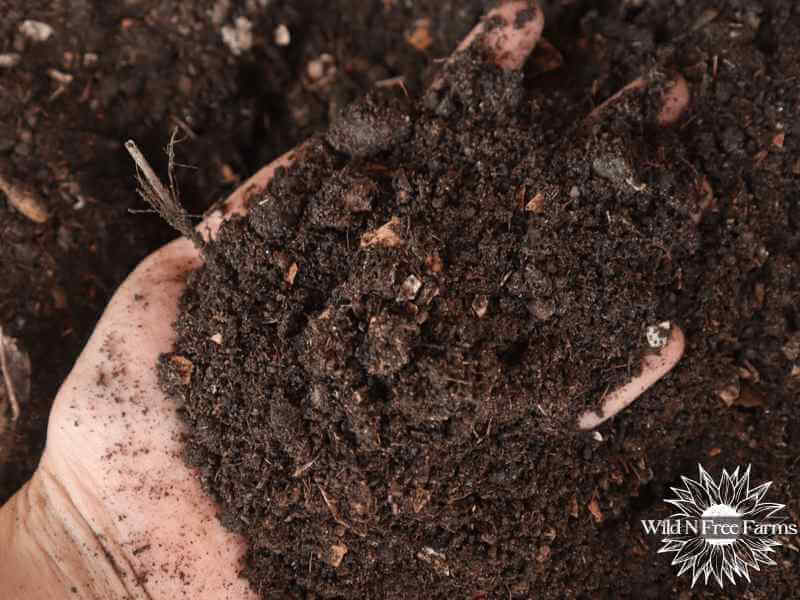
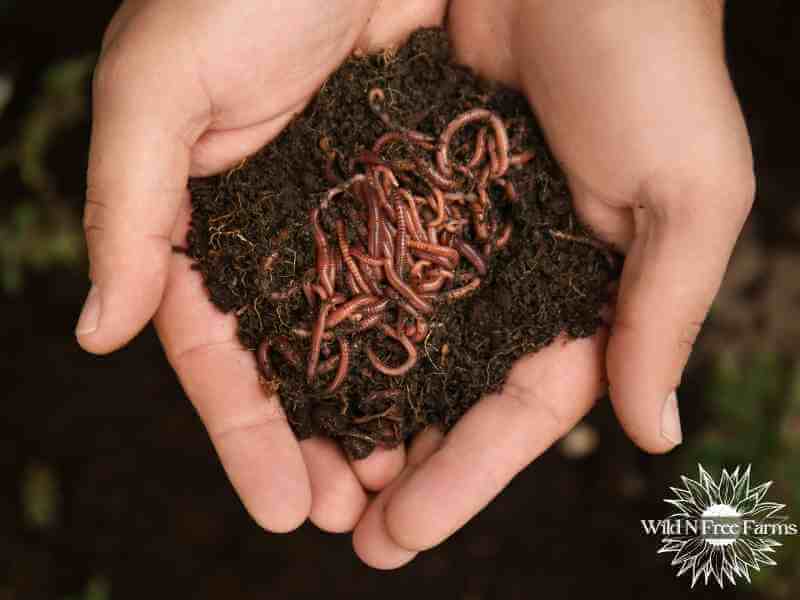
“What should I do with the worm castings?”
The nutrient-rich worm castings, also known as vermicompost, are a valuable resource for your plants. These castings can be used as a soil amendment or mixed with potting soil to provide essential nutrients and improve overall soil health. You can also make a nutrient-rich “worm tea” by steeping the castings in water and using it as a liquid fertilizer for your plants. The possibilities are endless when it comes to utilizing the benefits of worm castings!
“How do I protect my worm farm in the winter?”
To protect your worm farm during winter, there are a few key measures you can take. Firstly, ensure that the farm is located in a sheltered spot, away from extreme cold or freezing temperatures. Insulate the worm farm by adding a thick layer of organic bedding material which will provide warmth and act as a protective barrier. Additionally, consider covering the farm with a layer of breathable fabric or tarp to shield it from harsh weather conditions while still allowing air circulation. Monitor the moisture levels regularly, as excessive moisture can lead to freezing, and adjust accordingly. Lastly, minimize disturbances to the worms by reducing feeding during colder periods, as their activity slows down. By implementing these strategies, you can help safeguard your worm farm and ensure the well-being of its inhabitants throughout the winter season.
Incorporating vermicomposting into your gardening routine not only enriches your garden soil with nutrient-rich worm castings but also reduces waste and helps to combat climate change. As the famous proverb says, “We do not inherit the Earth from our ancestors; we borrow it from our children.” With vermicomposting, we give back to the Earth while nourishing our plants.