
Easy & Delicious Instant Pot Homemade Yogurt
Homemade yogurt is the absolute best yogurt to consume when it comes to actually getting a gut healing, nutrient rich product! Store-bought yogurts have been shown time and time again to be nutrient depleted, lack the healthy probiotics we all need, and contain added ingredients we all definitely DON’T need, such as excess sugar. Making Instant Pot homemade yogurt is super easy to do! With just a few steps, this recipe will have you replacing those sugar loaded cups in no time!

Disclaimer
This post contains affiliate links. This means we may earn a commission should you chose to sign up for a program or make a purchase using these links. There is no added cost to you but your purchase through these links helps support our content! Not to worry- I truly believe in and/or use everything I promote!
We also utilize advertisements on many of our articles. This is simply a way to help support all the work we do here at Wild N Free Farms, without adding any extra cost to our readers. Check out our disclaimer and disclosure page for more details.

Why A Multicooker?
A multicooker, such as an Instant Pot, is by far the easiest and most money saving appliance to use when making your own homemade yogurt!
Yogurt makers are definitely an option, however, a multicooker can offer you and your kitchen so much more as it has many functions. A multicooker can not only be used to make yogurt, but an appliance such as an Instant Pot can also offer you pressure cooking, rice, soup, and even canning capabilities (model specific). My Instant Pot is by far my favorite and most versatile kitchen appliance!
The milk and starter culture need a certain amount of time at a specific temperature in order to ferment properly and produce that gut healing, creamy product we all enjoy in yogurt.
An Instant Pot can pasteurize your milk with a simple click of a button and also keep the milk and culture at an optimal temperature to thrive, between 86-109°F (30-43°C) based on your model and preference.
Milk can also be fermented in a yogurt maker or simply a jar, tucked into the oven with the pilot light on. However, you will need to make sure the temperature is checked regularly with a clean thermometer as you don’t want to kill off the good bacteria by allowing the yogurt to get too warm. While these methods are an option, I find that the Instant Pot knocks them out of the park with its hands off, convenient yogurt making method.
Raw Milk Or Pasteurized Milk For You Instant Pot Homemade Yogurt?
Besides the choice of equipment, making your yogurt at home also requires the decision of pasteurization or completely raw milk. They both have their pros and cons, so essentially it will be up to your situation and preference.
Bacterial Battle
One pro to using raw milk is that it is already loaded with beneficial, native bacteria. A lack of pasteurization means all the healthy bacteria found in raw milk is going to be present in the yogurt you make. However, since different bacteria is going to be added in order to ferment the milk and create more of a yogurt taste, the native milk bacteria is going to be competing with the bacteria in the culture.
Over time, this battle of bacteria is essentially going to change the life in your yogurt and could possibly lead to an inferior taste and texture. It is recommended that a new yogurt culture be used for every batch of raw milk yogurt in order to prevent this competition and eventual bacterial change.
When you pasteurize your milk, or you use already pasteurized milk to make your yogurt, you won’t have to worry about the competition and can infinitely use a few tablespoons from your previous yogurt batch to inoculate the next batch. This is the money saving option as you will only have to buy the culture once, the first time you make yogurt, instead of every time to maintain the bacteria yogurt aims for.
Consistency
Another difference between raw milk and pasteurized milk, is the texture of the final product. When pasteurizing the milk before the yogurt culture is added, a whey protein known as lactoglobulin is denatured with the high temperature. After the culture is added, the bacteria get to work breaking down the lactose (milk sugar) into lactic acid, which triggers the casein proteins in the milk to denature. When both of these proteins are in their denatured form, they are able to join together to increase the amount of protein in the yogurt and create a thicker, smoother yogurt.
This is especially true when using high-protein milk, such as that from Jersey or Guernsey cows, and even more so when those cows are 100% grass-fed. A completely raw milk yogurt won’t have that whey protein breakdown, since their denaturing is triggered by high heat, and thus the yogurt will be more of a drinkable, milk kefir texture.

Starter Culture
Whether you’ve decided on completely raw milk or pasteurized, the type of culture you get is going to be the same. The two major strains of bacteria to make yogurt is Lactobacillus bulgaricus and Streptococcus thermophilus. There are loads more in each different kind of yogurt available but these two strains have been found in every variety.
The different types of bacteria that culture the milk is going to determine the taste, texture and smell of the yogurt. Whatever type of yogurt culture you use will yield the final product. For example, if you use a Greek yogurt culture, your yogurt is always going to come out as Greek yogurt.
There are many options available to culture your yogurt, including store-bought yogurt and cultures that have been freeze dried and powdered.
When using a store-bought culture, it is best to get one that only contains milk and the probiotic, which will be labeled as ‘live and active cultures’. The live and active culture ingredient is absolutely imperative as many store-bought yogurts are overly processed and lack the bacteria needed to culture your own milk.
Powdered cultures are a great way to go as they are designed specifically for yogurt making and won’t contain any added ingredients. We love Cultures For Health for our culture starters. Their site is also loaded with great information and other gut benefitting cultures to try!

How To Make Raw Milk Yogurt
If you’re able to get your hands on some raw milk, either from a local dairy or your own cows, and have decided that pasteurization is not for you, making completely raw milk yogurt is an easy process, especially using the Instant Pot.
Instructions
For a completely raw milk yogurt, simply heat the milk to 110°F on the stovetop and then mix your culture directly into your milk. In order for the good bacteria to grow, you will want to maintain a temperature of 110 F° (43 C°) or slightly below. The milk needs between 8-12 hours to ferment. You will know your yogurt is done when it smells and taste pleasantly sour and is a thicker, smooth texture. This can be done in the Instant Pot with the yogurt setting(see directions below), just make sure you skip over the boil function that is an option when pressing yogurt.

Your One Stop For Sourdough
Farm To Table recipes you’ll love!
Want More Homestead Inspired Recipes?
Check out our Recipe Index for delicious creations!
How To Make Pasteurized Milk Yogurt In The Instant Pot
If you prefer to go the pasteurized route and have your final product focused on specific yogurt bacteria, there are just a few more steps you will need to take. These steps are needed when using raw milk or already pasteurized milk, as we want to make sure there are no competing bacteria present in the milk.
Instructions
- In order to eliminate any kind of bacterial competition with the yogurt starter, you will need to first bring your milk up to 160-180°F (71-82°C). This is easily done in the Instant Pot. Simply pour your milk into the stainless-steel liner, secure the lid in place, and press the yogurt button until the screen reads ‘boil’. Allow the Instant Pot to do its thing and then release any pressure immediately after the timer goes off. You will want to temp your milk to ensure it reached the proper temperature before moving onto the next step.
- Now that the milk has been heated and any bacteria present has been eradicated, you need to cool down the milk before adding the culture. DO NOT SKIP THIS STEP! If the yogurt culture is added straight to the steaming hot milk, everything in that culture will be killed as well. You can leave the milk in the Instant Pot liner and simply remove it from the pot and place in a sink of ice cold water, being careful not to get any water in the milk. Stir frequently and the milk will only take a few minutes to cool down. It must reach a temperature at or below 110°F (43°C) before moving on.
- Pour a little of the milk into a separate bowl and return the liner to the pot. Whisk your yogurt culture into the separate bowl. Sometimes the Instant Pot hot plate can heat up the milk again so ensure the temperature is at or below 110°F before adding your milk/culture mix and stirring. I find that I get a smoother, creamier final product if I take my immersion blender to the entire pot before the fermentation and again when there’s an hour left.
- Return the lid and press the yogurt button again. Model dependent, the display screen will read yogurt or bring you to an hour timed screen. Here you can set the amount of hours you want your yogurt to culture. It will need at least 6 hours to culture properly but after that will depend on your liking. For a stronger yogurt, meaning more tang, allow it to ferment longer.
- Since all bacteria was killed off during the initial pasteurization, you can save a bit of this yogurt to inoculate your next batch without having any change in bacterial dominance. Simply scoop a few tablespoons or more (save enough for the size batch you want to make next, at least 3 tablespoons for every 4 cups of milk) into a clean jar. Secure with a lid, label and save in the fridge for the next batch, up to two weeks!

Easy and Delicious Homemade Instant Pot Yogurt
Equipment
- Instant Pot or other similar cooker, yogurt maker
Ingredients
- 4 Cups Milk Raw or Pasteurized
- 3 Tbsp Culture
Instructions
- Pour the milk into the liner of your Instant Pot. Secure the lid and press the 'yogurt' button until the screen reads 'boil'.
- After the Instant Pot timer goes off, vent any pressure and then carefully remove the lid. Use a clean thermometer to make sure the milk has reached 160-180°F.
- Quickly cool down the milk by placing the Instant Pot liner in a sink of ice cold water. Stir frequently until the milk temperature reaches 110°F or less.
- Reserve 1/2 cup of milk into a separate bowl and return the liner to the Instant Pot.
- Add your culture into the 1/2 cup of milk and whisk until combined. Pour the milk/culture mix back into the liner and give it a THOROUGH whisk.
- Return the Instant Pot lid and secure in place. Press the 'yogurt' button again until the screen begins an hour/minute display. Set for the amount of hours desired according to your preference, but no less than 6 hours.
- OPTIONAL STEP: About an hour before your yogurt is set to go off, open the lid and give it a good stir either with a whisk or immersion blender. This helps incorporate the culture throughout and create a smoother yogurt.
- After the timer goes off, remove the lid and ensure the yogurt has set, or thickened. Add additional time if need be.
- The yogurt can be left out for a few hours more to continue fermenting or can be placed in a jar in the fridge for no more then two weeks. Be sure to reserve a few tablespoons for the next batch before adding any flavoring.
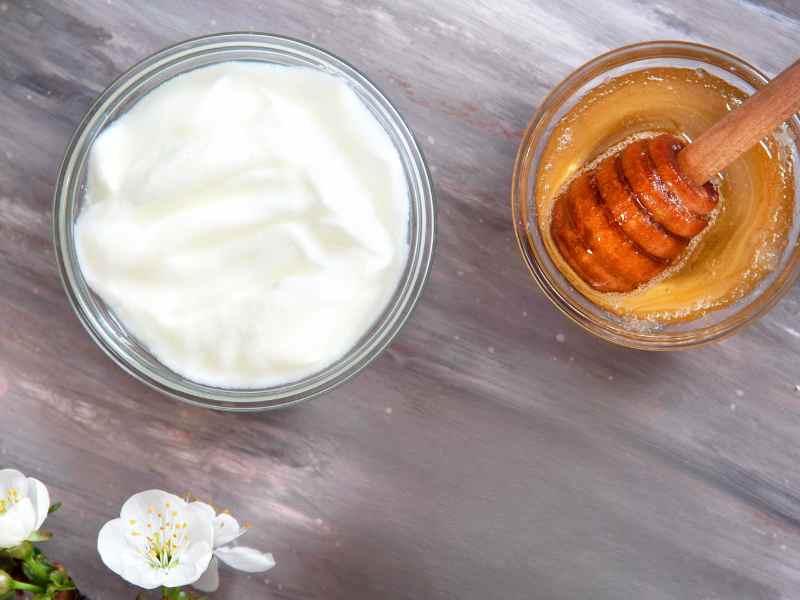
Yogurt Additions

There are lots of additional ingredients you can add to yogurt after it’s made, and the starter for your next batch has been saved in a separate dish. Fruit, nuts, granola, and even chocolate make a great flavor addition to yogurt.
If you have picky kids like mine, you may need to sweeten it up a bit! I love using honey as a sweetener as it contains so many of its own benefits, making the yogurt even more of a nutritional powerhouse!
We also love adding a little vanilla or other flavor extracts.
There is no need to eat sugar loaded, over processed, or boring yogurt when you can make it so easily at home with real ingredients!
Your One Stop For Sourdough
Farm To Table recipes you’ll love!
Want More Homestead Inspired Recipes?
Check out our Recipe Index for delicious creations!


