
Elderberry Syrup: A Sweet Solution for Optimal Health and Wellness
Are you looking for a sweet solution to boost your overall health and well-being? Look no further than elderberry syrup – a delicious and powerful elixir that can provide a range of benefits for your body. From understanding the science behind this magical syrup to learning how to make it from scratch, this article will take you on a journey to explore the natural goodness of elderberry syrup. So, buckle up and get ready to indulge in the sweetness while improving your immune system and overall health.

Disclaimer
This post contains affiliate links. This means we may earn a commission should you chose to sign up for a program or make a purchase using these links. There is no added cost to you but your purchase through these links helps support our content! Not to worry- I truly believe in and/or use everything I promote!
We also utilize advertisements on many of our articles. This is simply a way to help support all the work we do here at Wild N Free Farms, without adding any extra cost to our readers. Check out our disclaimer and disclosure page for more details.
Medicinal Benefits of Elderberry Syrup
To truly appreciate the benefits of elderberry syrup, it’s important to understand the science that makes it such a powerful addition to your health routine. Elderberries, the main ingredient in this magical elixir, are packed with antioxidants, vitamins, and minerals that can work wonders for your body.
Antioxidants
One of the key components of elderberries is their high concentration of antioxidants. Antioxidants are molecules that help protect your cells from damage caused by free radicals, which are unstable molecules that can harm your body. The antioxidants found in elderberries can help neutralize these free radicals and prevent oxidative stress, which has been linked to various chronic diseases.
Vitamins & Minerals
In addition to antioxidants, elderberries also contain a variety of vitamins and minerals that can contribute to your overall health. For example, elderberries are a rich source of vitamin C, which is essential for a strong immune system and plays a role in collagen formation, wound healing, and iron absorption. They also contain vitamin A, which is important for maintaining healthy skin and vision, as well as potassium, calcium, and iron.
Cytokine Boost
It’s not just the individual components of elderberries that make them so beneficial. Studies have shown that elderberry syrup can help boost your immune system and reduce the duration and severity of cold and flu symptoms. The syrup has been found to stimulate the production of cytokines, which are proteins that play a crucial role in regulating immune responses. By enhancing your body’s immune response, elderberry syrup can help you stay healthy and ward off illnesses.
Benefits
Due to all these amazing properties of the elderberry, making and consuming your own elderberry syrup can offer the following medicinal benefits:
Immune System Support
Elderberries are rich in flavonoids, particularly anthocyanins, which possess powerful antioxidant and anti-inflammatory properties. These compounds play a crucial role in supporting the immune system, helping the body fend off infections and diseases.
Cold and Flu Relief
Elderberry syrup has been traditionally used as a natural remedy for colds and flu due to its ability to reduce the severity and duration of these illnesses. The syrup can alleviate symptoms such as congestion, cough, and sore throat.
Antiviral Properties
Research suggests that elderberries have antiviral effects against common viruses like influenza, by inhibiting their ability to replicate and spread in the body.
Heart Health
The anthocyanins in elderberries also contribute to improved heart health by reducing oxidative stress and inflammation, which can be beneficial for cardiovascular function.

Using Homegrown Elderberries
To fully embrace the benefits of elderberry syrup, why not take it a step further and create your own homemade version? Harvesting and storing your own homegrown elderberries is a fun and rewarding process that allows you to harness the full potential of this natural remedy. By becoming your own forager, you can ensure a fresh and plentiful supply of elderberries for your syrup-making endeavors.
Harvesting
When it comes to harvesting elderberries, timing is key. The berries are typically ready for picking in late summer or early fall, usually around August or September. The exact timing may vary depending on your location and the specific variety of elderberries you have.
Storing
After harvesting, it’s important to store the elderberries properly to maintain their freshness and quality. Before storing, remove any leaves, stems, and unripe or damaged berries. Rinse the berries in cool water to remove any dirt or debris, and then gently pat them dry with a clean towel.
To store the elderberries, you have a few options depending on how soon you plan to make your elderberry syrup. If you plan to use them within a few days, you can store them in a sealed container in the refrigerator. For longer-term storage, consider freezing the berries. Spread them out in a single layer on a baking sheet and place in the freezer until they are firm. Once frozen, transfer them to a freezer-safe bag or container, removing as much air as possible to prevent freezer burn.

How to Make Elderberry Syrup With Fresh Berries
Making elderberry syrup from fresh elderberries is a rewarding and delicious process that allows you to unlock the full potential of these vibrant berries.
Step 1: Harvest your Berries
To begin, start by gathering a generous amount of fresh elderberries. Look for elderberry clusters that are fully ripened, with dark purple or black berries. It’s important to note that elderberries should never be consumed raw, as they can cause digestive upset. To ensure their safety and maximize their health benefits, they must be cooked before use.
Step 2: Remove Berries From the Stem
Once you have collected your elderberries, gently remove the berries from the stems. This can be done by running a fork or a wide-toothed comb through the clusters, allowing the berries to fall into a clean bowl. This step requires a little patience, but it’s worth the effort to separate the berries from any unwanted stems or leaves.
Step 3: Boil the Berries
Next, give the berries a thorough rinse under cool running water to remove any dirt or debris. Once clean, transfer the berries to a large pot and add just enough water to cover them. Bring the water to a gentle simmer over low heat, allowing the berries to soften and release their juices. Stir occasionally to prevent sticking or burning.
Introducing
From Soil To Syrup
Your ultimate guide to everything elderberries!
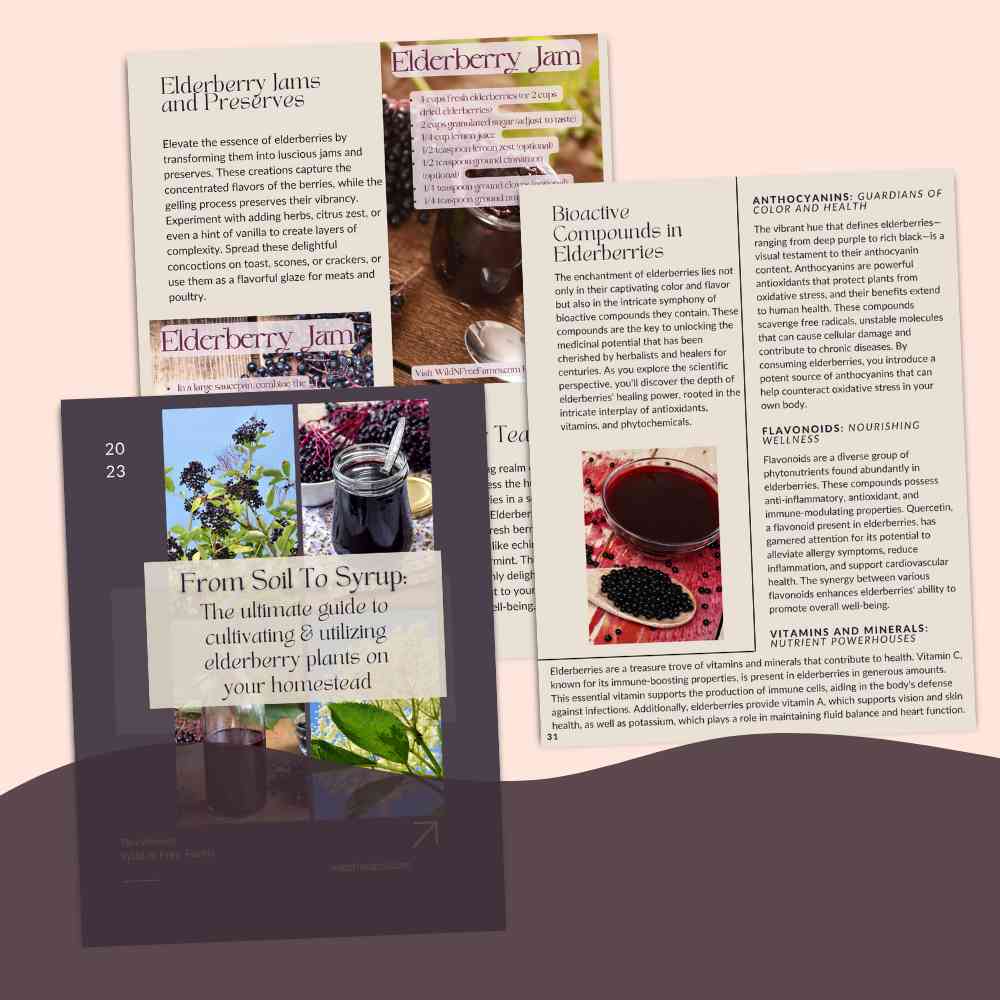
From cultivation to culinary delights, medicinal uses, and even safe animal consumption, this book has it all!
Learn how to efficiently and cost-effectively grow your elderberry patch, saving you money on unnecessary purchases and failed attempts.
Whether you dream of crafting homemade syrups for your family or expanding your garden with purpose, this book is your partner in creating a thriving elderberry homestead.
Step 4: Strain the Mixture
After about 30 minutes, the berries should be soft and mushy. At this point, it’s time to strain the mixture to separate the liquid from the berry pulp. You can use a fine-mesh sieve or cheesecloth placed over a clean bowl to accomplish this. Press down gently on the pulp to extract as much liquid as possible.
Step 5: Adding Sweet & Spice
With the liquid strained, discard the pulp and return the elderberry juice to the pot. Now, it’s time to add some sweetness and additional flavors. Many recipes suggest adding honey, maple syrup, or another natural sweetener to taste. You can also enhance the flavor profile by incorporating spices such as cinnamon, ginger, or cloves. Experiment with different combinations until you find the perfect balance of sweetness and spice.
Step 6: Incorporate Flavors & Consistency
Bring the mixture to a gentle simmer once again, stirring to incorporate the sweetener and spices. Allow the syrup to simmer for another 10-15 minutes, ensuring that all the flavors are well blended. Keep a close eye on the pot, as the syrup can thicken quickly.
Step 7: Bottle & Store
Once your elderberry syrup has reached the desired consistency, remove it from the heat and let it cool. Transfer the syrup into clean, airtight containers such as glass jars or bottles. Properly stored in the refrigerator, your homemade elderberry syrup can last up to several months.
With your freshly made elderberry syrup in hand, you’re now ready to discover the many ways to incorporate this sweet and nutritious elixir into your daily routine. From drizzling over pancakes to adding a spoonful to your favorite smoothie or tea, the possibilities are endless.

How to Make Elderberry Syrup With Dried Berries
While making elderberry syrup from fresh elderberries is undoubtedly a delightful experience, using dried elderberries offers a convenient alternative for year-round syrup making. By harnessing the power of dried elderberries, you can enjoy the natural goodness of elderberry syrup anytime, regardless of the season.
The process of making elderberry syrup with dried berries is very similar to making it with fresh berries. Elderberries shrink considerably when dried so one key difference in the process is less will be used. Instead of 2 cups of elderberry, a recipe using dried berries will only require 1 cup. Additionally, it is recommended to soak dried berries in water for 10-15 minutes prior to using them. This will allow them to rehydrate and make them a little easier to work with, however this step is completely optional.
Drying excess elderberries during peak season is a great way to ensure you have homegrown berries for your syrup come winter. Elderberries can be dried a few different ways and the process can take anywhere from 12 hours to several days, depending on the drying method, humidity, and the size of the elderberries. The berries are ready when they are completely dry to the touch and slightly shriveled.
Air Drying
This method is by the simplest but it does require more time. Simply spread the cleaned elderberries in a single layer on a clean, dry surface such as a baking sheet, wire rack, or food dehydrator tray. Make sure the berries are not touching each other to ensure proper airflow. Place them in a well-ventilated area away from direct sunlight and leave them to sit for a few weeks until completely dry. Stir the berries occasionally to ensure even drying.
Oven Drying
Preheat your oven to the lowest temperature setting (usually between 120°F to 140°F or 50°C to 60°C). Line a baking sheet with parchment paper and place the elderberries in a single layer on the sheet. Leave the oven door open slightly to allow moisture to escape. Keep a close eye on the berries and periodically check their progress. Allow them to cool completely before storing.
Dehydrator
A dehydrator is a great way to go for drying elderberries. Ensure the berries are cleaned and all leaves and stems are removed. Set up your food dehydrator according to the manufacturer’s instructions. Preheat to a low temperature setting, ideally between 125°F to 135°F (approximately 52°C to 57°C). Arrange the berries in a single layer on the dehydrator trays and place the trays into the dehydrator. The timer should be set according to the manufacturer’s guidelines. However, drying elderberries typically takes anywhere from 8 to 12 hours or more, depending on the moisture content of the berries.
While making elderberry syrup from fresh elderberries is undoubtedly a delightful experience, using dried elderberries offers a convenient alternative for year-round syrup making. By harnessing the power of dried elderberries, you can enjoy the natural goodness of elderberry syrup anytime, regardless of the season.
Additional and Beneficial Ingredients to Add
Adding complementary ingredients and herbs to elderberry syrup can enhance its flavor and provide additional health benefits. Here are some popular options:
Cinnamon
- Check out our favorite>>Organic Ceylon
- Flavor: Cinnamon adds warmth and a slightly sweet, spicy flavor to the syrup.
- Health Benefits: Cinnamon is rich in antioxidants and has anti-inflammatory properties. It may help regulate blood sugar levels and improve heart health.
Ginger

- Check out our favorite>>Ginger Root
- Flavor: Ginger imparts a zesty, slightly peppery and pungent taste to the syrup.
- Health Benefits: Ginger is known for its anti-nausea and anti-inflammatory properties. It can also support digestion and may help alleviate cold and flu symptoms.
Cloves
- Check out our favorite>> Organic Clove
- Flavor: Cloves have a strong, sweet and aromatic flavor that complements the elderberry syrup.
- Health Benefits: Cloves are packed with antioxidants and possess antimicrobial properties. They may aid in digestion and provide relief from respiratory issues.
Lemon or Orange Peel
- Flavor: Lemon or orange peel adds a refreshing citrusy aroma and a hint of tanginess to the syrup.
- Health Benefits: Citrus peels are rich in flavonoids and vitamin C, which can enhance the immune-boosting properties of the syrup.
Echinacea
- Check out our favorite>> Echinacea root
- Flavor: Echinacea has a mild, slightly earthy taste that blends well with elderberry syrup.
- Health Benefits: Echinacea is known for its immune-stimulating properties and is often used to support the body’s defenses during cold and flu season.
Rosehips

- Check out our favorite>>Rosehips cut & sift
- Flavor: Rosehips contribute a tart and tangy flavor to the syrup.
- Health Benefits: Rosehips are a great source of vitamin C, antioxidants, and anti-inflammatory compounds, which can further boost the immune system.
Thyme
- Check out our favorite>>Thyme Leaf Cut & Sift Organic
- Flavor: Thyme offers a subtle herbal flavor that complements the sweetness of elderberry syrup.
- Health Benefits: Thyme has antiviral and antibacterial properties and may provide relief from respiratory issues and cough.
Raw Honey
- We suggest a local, raw honey. Your area farmers market is a great place to check!
- Flavor: Raw honey adds sweetness and depth to the syrup, enhancing its overall taste.
- Health Benefits: Raw honey is rich in antioxidants and has natural antibacterial properties. It may help soothe sore throats and provide immune support.
Rosemary
- Check out our favorite>>Rosemary Leaf Whole Organic
- Flavor: Rosemary adds a woody, aromatic flavor to the syrup.
- Health Benefits: Rosemary is rich in antioxidants and has anti-inflammatory properties, which can offer additional health benefits.
Licorice Root
- Check out our favorite>>Licorice Root Cut & Sift Organic
- Flavor: Licorice root imparts a sweet and mildly spicy taste to the syrup.
- Health Benefits: Licorice root may help soothe respiratory issues, support the digestive system, and possess anti-inflammatory properties.

Elderberry Syrup Recipe Fresh Berries

Immune-Boosting Elderberry Syrup Recipe
Ingredients
- 2 Cups Fresh Elderberries
- 3 Cups Filtered Water
- 1 Cup Raw, Local Honey
- 1 Cinnamon Stick (optional)
- 1-2 Slices Fresh Ginger (optional)
- 3-4 Whole Cloves (optional)
Instructions
- Rinse the fresh elderberries under cold water and remove any stems or green parts.
- In a saucepan, combine the elderberries, water, cinnamon stick, ginger, and cloves (if using).
- Bring the mixture to a boil, then reduce the heat and simmer for about 30-45 minutes until the berries are soft.
- Use a potato masher or the back of a spoon to mash the berries and release their juices.
- Strain the mixture through a fine-mesh sieve or cheesecloth into a clean bowl, pressing to extract as much liquid as possible.
- Let the liquid cool to room temperature before adding the honey (adding it while hot may destroy some of its beneficial properties).
- Stir the honey until it's fully dissolved in the elderberry liquid.
- Transfer the elderberry syrup to sterilized glass bottles or jars, and store it in the refrigerator for up to two months.
Elderberry syrup is a valuable addition to your natural health arsenal, providing immune-boosting properties and numerous medicinal benefits. By understanding the science behind elderberry syrup and learning how to make it from fresh or dried elderberries, you can harness the power of this elixir to support your well-being and promote a healthier lifestyle.
It’s not just the numerous health advantages that make elderberry syrup worth experiencing. The rich, deep purple hue and the sweet yet slightly tangy taste make every spoonful a delight for the senses. Whether taken straight from the spoon or mixed into your favorite beverages, elderberry syrup adds a burst of flavor that will invigorate your taste buds and leave you wanting more.


