
Incredibly Easy, Soft Sourdough Sandwich Bread
In the world of bread making, there’s something truly magical about the process of creating a loaf of sourdough sandwich bread from scratch. Not only does it offer unparalleled flavor and texture, but it also boasts a host of health benefits thanks to its natural fermentation process.

Disclaimer
This post contains affiliate links. This means we may earn a commission should you chose to sign up for a program or make a purchase using these links. There is no added cost to you but your purchase through these links helps support our content! Not to worry- I truly believe in and/or use everything I promote!
We also utilize advertisements on many of our articles. This is simply a way to help support all the work we do here at Wild N Free Farms, without adding any extra cost to our readers. Check out our disclaimer and disclosure page for more details.
I’ve tried many different sourdough sandwich bread recipes. However, none of them were giving me that soft and buttery bread I wanted with very little effort on my part. Because after all, I didn’t want to spend a couple hours stretching and folding every single week for sliced bread that my kids will devour in a day.
It took me quite a bit of trail and error but I believe I finally have a recipe and technique that knocks all other sourdough sandwich bread’s out of the park!

The Role of Sourdough in Sandwich Bread
Sourdough bread is renowned for its unique tangy flavor, chewy texture, and complex aroma—all of which are achieved through the process of natural fermentation. Unlike commercial yeast, which provides a quick rise and uniform flavor profile, sourdough relies on wild yeast and beneficial bacteria present in a starter culture to leaven the dough. This extended fermentation period not only enhances the flavor and texture of the bread but also makes it easier to digest and more nutritious. Moreover, sourdough bread typically boasts a longer shelf life compared to its commercial counterparts, thanks to the acidic environment created during fermentation, which inhibits the growth of mold and extends freshness.
When it comes to sandwich bread, sourdough adds a depth of flavor and character that elevates the humble sandwich to new heights. Whether paired with savory fillings like deli meats and cheeses or spread with the childhood classics of PB&J, sourdough sandwich bread provides the perfect canvas for a wide range of culinary creations. Its soft yet sturdy crumb ensures that it holds up well to fillings without becoming soggy, while its subtle tang adds a delightful contrast to the flavors within.

Crafting the Perfect Soft Sourdough Sandwich Bread
Now that we understand the unique role of sourdough in sandwich bread, let’s dive into the step-by-step process of creating your own batch of irresistibly soft sourdough sandwich bread.
Here’s what you’ll need:

- 300g active sourdough starter
- 650g Warm water
- 50g Coconut oil
- 60g Honey
- 20g Salt
- 1200g All-purpose flour
- Stand Mixer
- Loaf Pan(s)
- Large Bowl
Recipe Tips & Notes
- No stand mixer? I stand mixer will make the process a lot easier but it’s isn’t absolutely necessary. After mixing all the ingredients and allow it to rest, knead the dough by hand on a lightly floured surface until a smooth, soft and elastic dough balls forms. Focus on the texture of your dough, not the time.
- What pan size? The size of pan you use is completely up to your preference. A 8.5×4 inch loaf pan or 9×5 are going to be perfect.
- Do I need honey though? Absolutely not! If you prefer a sweetener free bread, you can absolutely omit the honey without having to worry about the recipe being a flop. It can also be substituted for different sweetener options if need be.
- What If I Don’t Have Time To Finish? At any point in the process, if you need to run or can’t finish your bread, you can always put the dough into the fridge. Refrigeration slows down the rise and ferment in order to give you more time to get it done.

How To Make Soft & Easy Sourdough Sandwich Bread
One of the best things about having sourdough on hand is you are literally becoming more self-sufficient in not requiring commercially bought yeast. This is because that beautiful starter contains all the lactic acid bacteria and wild yeast we need in order to get a rise out of our bread.
Preparing The Levain
In the morning, begin by creating your sourdough levain. Combine 150g flour (whatever flour you use in your starter is fine), 150g filtered water, and 30g sourdough starter.
Allow this mixture to ferment until it reaches its peak. The time of this will vary greatly depending on the ambient temperature and humidity of your kitchen.
Mix The Dough
Once your levain has reached peak, it’s time to combine everything! It the bowl of your mixer, combine the levain, warm water, coconut oil (it doesn’t have to be completely melted but you do want it fairly soft), honey, and salt. Mix this with the paddle attachment for a few minutes, just until everything is fairly combined.

Next you’ll add in the flour. You may not be able to add all of it before needing to switch over to the dough hook.
Allow all the ingredients to mix with the dough hook for about 10-15 minutes. The dough should be completely pulling away from the sides and bottom and be able to pass the windowpane test (gently stretch the dough between your fingers. If it forms a thin, translucent membrane without tearing, you’re good to go).
Build and Ferment (Rise)
Transfer the dough onto a lightly floured surface and perform a few coil folds until it forms a smooth, round ball.
Place the dough in a large bowl and cover with plastic wrap or a dish cloth. Allow it to sit out on the counter, fermenting at room temperature, for about 10-12 hours. Leaving it out on my counter overnight always works perfect for me!
The next morning, my dough has expand significantly! If you’re not doing an overnight rise, let it sit in a warm, moist spot until it has at least doubled in size.
Shape and Second Rise
After the dough has risen by about half, degas it by gently punching the center. Dump it out onto a lightly floured surface and divide it into two equal balls. One ball at a time, flatten it with your fingers. You’ll want to make sure you get out as much of the gas as possible so you don’t get big holes in your sandwich bread.
There are a few different ways to shape sandwich bread but ultimately you’ll want your finished dough to look like a log, about the entire width of your bread pan.
Coat your bread pans in cooking spray or butter before transferring a dough ball into each pan.
If you only have one bread pan, keep the second dough as a ball and put it into the fridge. After the first loaf comes out, you can take it out of the fridge, allow it to warm up a bit, and then shape. By the time your done your bread pan should be cooled down and ready to go again.
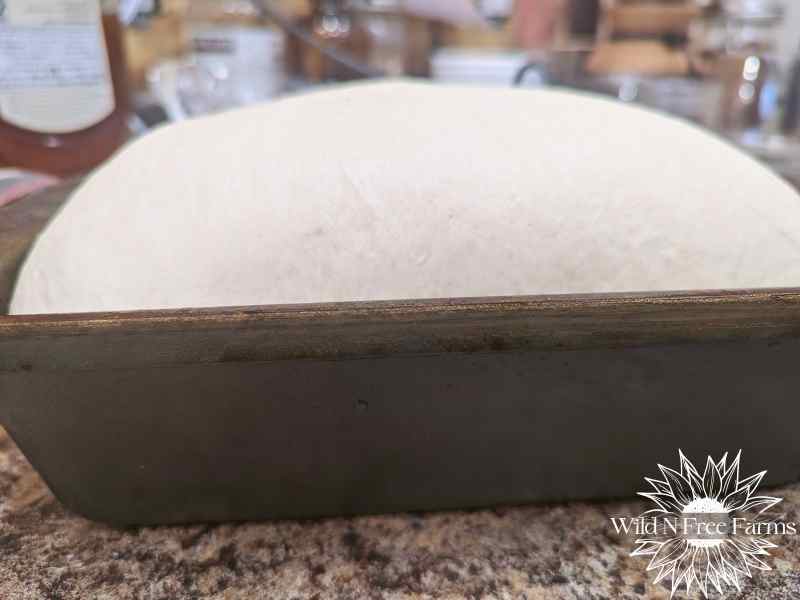
Allow the bread to rise a second time in the bread pan, until it is about a 1-inch or 2 above the rim. The dough should look nice and puffy when it’s done. This step could take awhile so make sure your patient with it. Using a proofing box is a great way to speed up this process, potentially cutting your time by more than half!

Your One Stop For Sourdough

Farm To Table recipes you’ll love!
Want More Homestead Inspired Recipes?
Check out our Recipe Index for delicious creations!
Baking The Bread
Preheat your oven to 375°F (190°C), when the dough is about 1-inch over the rim of the pan. It’s ok to allow your oven to heat up fully before putting the bread in, even if it’s risen all the way, as this will ensure you have a completely ready dough.
Once preheated, place the pans on the center rack for 45-60 minutes, or until the loaves are golden brown. The internal temperature of your bread should be 190°F when done. If you find the top is getting a little too brown before it reaches this temp, place a tin foil cover over the top.
Remove the loaves from the oven and brush the tops with butter until nicely coated. For even more crispy buttery goodness, place it back in the hot (off) oven for 5 minutes.
Allow the loaves to cool on a cooling rack for at least an hour before slicing!

Incredibly Easy Sourdough Sandwich Bread
Equipment
Ingredients
- 300 g active sourdough starter
- 650 g warm water
- 50 g coconut oil
- 60 g honey
- 20 g salt
- 1200 g all-purpose flour
Instructions
Morning of:
- Create your sourdough leaven by combining 150g flour, 150g water, and 30g sourdough starter. Allow this mixture to ferment until it reaches its peak, which typically takes around 10 hours, depending on ambient temperature and humidity.
Evening:
- In the evening, combine the sourdough leaven, warm water, coconut oil, honey, salt, and flour in the bowl of a stand mixer or a large bowl if kneading by hand.
- Allow the dough to mix for about 10 minutes or until it passes the windowpane test. To perform the windowpane test, take a small piece of dough and gently stretch it between your fingers. If it forms a thin, translucent membrane without tearing, the dough is adequately developed.
- Transfer the dough to a lightly floured surface and perform a few coil folds until it forms a smooth, round ball.
- Place the dough in a large bowl, cover it, and let it ferment overnight at room temperature for 10-12 hours.
Morning:
- Degas the dough by gently punching the center and then transferring it to a floured countertop.
- Divide the dough into two equal portions, each weighing approximately 1200g.
- Gently flatten the dough with your fingers to remove any air pockets, then shape each portion into a log.
- Grease or butter two loaf pans, then place each shaped dough log into a pan.
- Cover the pans and allow the dough to undergo its second rise until it reaches about 1 inch over the top of the loaf pans. This may take several hours, so be patient and let the dough rise until it appears nice and puffy.
Afternoon/Evening:
- Preheat your oven to 375°F (190°C). Once preheated, place the pans on the center rack and bake for 45-60 minutes, or until the loaves are golden brown and sound hollow when tapped on the bottom.
- Remove the loaves from the oven and brush the tops with melted butter. Return the loaves to the oven for an additional 5 minutes to allow the butter to melt and create a shiny crust.
- Allow the loaves to cool in the pans for at least an hour before slicing into them.
Flour Variations
- Whole Wheat: If you prefer to have a whole wheat sandwich bread, replace 20% of the all-purpose flour with whole wheat or light whole wheat. The dough may become a bit drier, as whole grain flours tend to absorb more liquid. If it seems to stiff, simply add 1 teaspoon of water at a time until it becomes soft and workable.
- Bread Flour: If you prefer to use bread flour, do an even swap for the all-purpose flour. Again, add a teaspoon of water at a time if the dough seems too dry or stiff.
- Gluten-Free Option: If you need your sandwich bread gluten-free, many grocery stores carry pre-made gluten-free all-purpose flour blends that are specifically formulated to replace wheat flour in baking recipes. These blends typically contain a combination of rice flour, tapioca flour, potato starch, and other gluten-free ingredients. Look for a blend that is suitable for bread baking and has a similar texture to wheat flour.
Storing Your Soft Sourdough Sandwich Bread
Once you’ve put your heart and soul into crafting the perfect loaf of soft sourdough sandwich bread, it’s essential to store it properly to maintain its freshness, flavor, and texture for as long as possible. Whether you plan to enjoy your bread within a few days or want to preserve it for longer-term storage, here are the best methods for storing your homemade masterpiece.
On the Counter
If you anticipate consuming your sourdough sandwich bread within a few days, storing it on the counter is an excellent option. However, to prevent it from drying out or becoming stale too quickly, it’s crucial to follow these simple guidelines:
- Cool Completely: Allow your freshly baked bread to cool completely on a wire rack before storing it. This helps prevent condensation from forming inside the storage container, which can lead to soggy bread.
- Breathable Container: Store the bread in a breathable container, such as a paper bag or cloth bread bag. Avoid sealing it in airtight containers or plastic bags, as this can trap moisture and cause the crust to become soft and rubbery.
- Slice as Needed: If you don’t plan to consume the entire loaf at once, only slice off what you need to minimize exposure to air. This helps preserve the freshness of the remaining bread.
- Avoid Direct Sunlight: Keep the container of bread away from direct sunlight and heat sources, as exposure to light and warmth can accelerate staling.
Freezing for Long-Term Preservation
If you’ve baked multiple loaves of sourdough sandwich bread or want to stock up for future use, freezing is an excellent option for long-term preservation. Here’s how to freeze your bread effectively:
- Cool Completely: As with storing bread on the counter, allow your freshly baked loaves to cool completely on a wire rack before freezing. This helps maintain the bread’s texture and prevents excess moisture from forming.
- Wrap Well: Once cooled, tightly wrap the entire loaf or individual slices in plastic wrap or aluminum foil. Alternatively, you can use resealable freezer bags or airtight containers specifically designed for freezing bread.
- Label and Date: To keep track of your frozen bread and ensure you use it before it loses quality, label each package with the date of freezing and any relevant details, such as the type of bread or slice count.
- Freeze Quickly: Place the wrapped bread in the freezer as soon as possible to prevent any potential moisture absorption or flavor loss. For optimal results, try to freeze the bread within a few hours of baking.
- Thawing and Reheating: When you’re ready to enjoy your frozen sourdough sandwich bread, simply remove the desired number of slices or loaves from the freezer and allow them to thaw at room temperature for a few hours. Alternatively, you can reheat individual slices in a toaster or warm the entire loaf in a preheated oven wrapped in aluminum foil for a few minutes.
mastering the art of crafting soft sourdough sandwich bread is a rewarding journey that combines the ancient tradition of sourdough fermentation with modern baking techniques. By understanding the role of sourdough in sandwich bread and following a detailed recipe and technique, you can create loaves that are not only delicious and nutritious but also perfect for elevating your favorite sandwiches to new heights of culinary delight. So, roll up your sleeves, gather your ingredients, and embark on your own sourdough adventure—you’ll be rewarded with homemade bread that’s sure to impress even the most discerning sandwich aficionados.


